In this step-by-step article we will walk you through two hassle-free methods for upgrading your Windows 10 installation to the highly anticipated Windows 11. You won’t need a USB drive, as both methods involve downloading and upgrading directly on your PC. However, always remember to back up your important data before proceeding with any major update, as unexpected issues can arise. While there are no guarantees, if the update goes smoothly, your apps and data should remain intact.

Method 1: Using Windows Update
Step 1: Check Windows Update
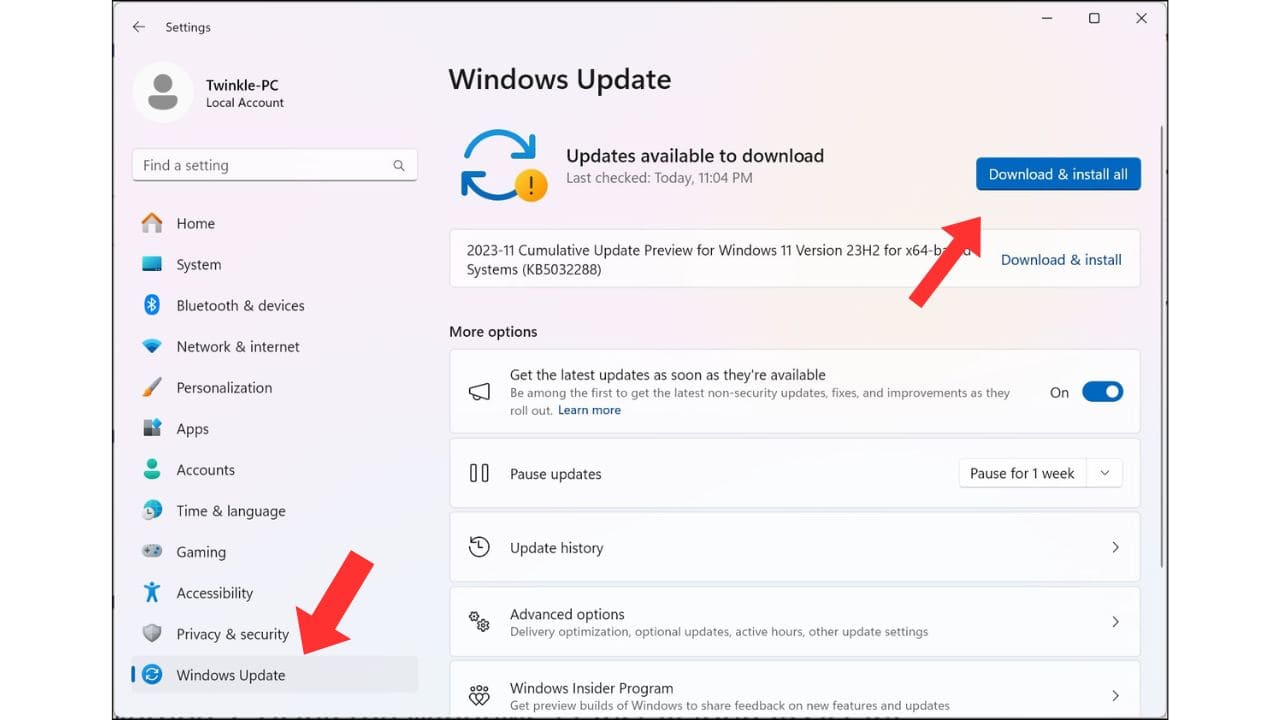
- Open the Windows Update section on your Windows 10 installation.
- Look for a banner at the top indicating that your PC is ready for Windows 11. If you see it, you’re good to go.
Step 2: Initiate the Update
- If you don’t see the banner, simply click “Check for updates,” and it may appear. If not, don’t worry; we’ll cover an alternative method later in the article.
- If the banner is present, click on “Download and Install” within the banner.
- Accept the license terms and proceed.
- Windows will download and install the update, which may take some time.

Step 3: Restart Your Computer
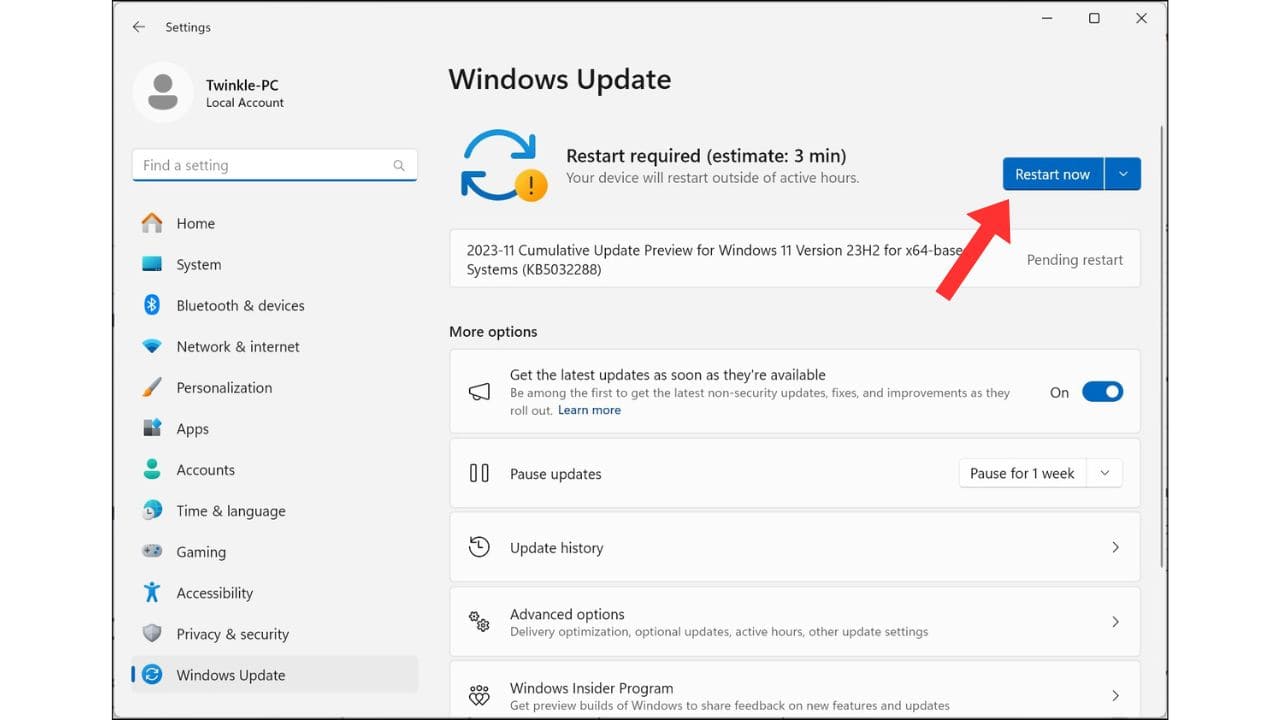
- After the update is downloaded and installed, you’ll be prompted to restart your computer.
- Select “Restart” to continue the installation.
- Your computer may restart several times during the upgrade process, so be patient.

Step 4: Log In to Windows 11
- After the upgrade is complete, log in, and you’ll find Windows 11 waiting for you.
Method 2: Using the Windows 11 Installation Assistant
Step 1: Check Compatibility
- Use the PC Health Check app on your Windows 10 computer to ensure it’s compatible with Windows 11.
- Search for “PC Health Check” in the Windows search bar, run the app, and click “Check now” to determine compatibility.
- If your PC is compatible, proceed to the next step.
Step 2: Install Windows 11 with the Installation Assistant.
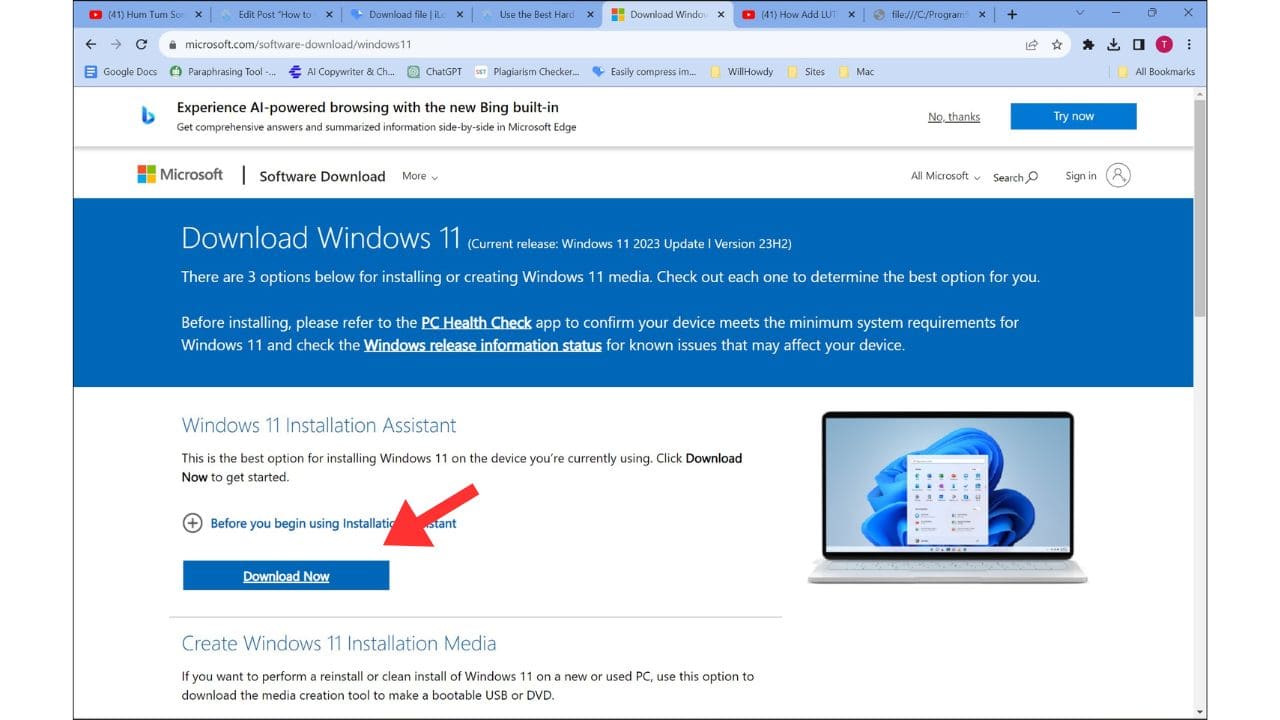
- Visit the Microsoft Windows 11 download site.
- Locate the Windows 11 Installation Assistant and click “Download Now.”
- Review the notes before starting the upgrade.

Step 3: Run the Installation Assistant
- After downloading, locate the file and right-click it.
- Choose “Run as Administrator” and accept the terms and conditions to begin the upgrade process.
- Windows will download and install the upgrade; this can take some time.

Step 4: Restart Your Computer
- After the installation is finished, you’ll receive a notification that your PC is ready.
- Click “Restart now” to initiate the process; your computer may restart on its own after a 30-minute countdown.
- During the upgrade, your computer may restart multiple times, so don’t intervene.

Step 5: Log In to Windows 11
- Once the upgrade is complete, log in to your computer, and you’ll be greeted by Windows 11.
Conclusion:
Congratulations, you’ve successfully upgraded to Windows 11! Enjoy exploring the new features and enhancements it offers. Keep in mind that you have 10 days to decide whether you want to revert to Windows 10. If you decide to go back, use the “Go back to Windows 10” option in the system settings.