File Explorer crashing in Windows 10 or Windows 11 is a very common issue that can be frustrating to deal with. Fortunately, you can often resolve this problem on your own by following a few simple steps. Here, we’ll show you how to fix common issues with your device.
Step 1: Restore File Explorer Settings to Defaults
- Click on the search icon in the taskbar.
- Type “Control” and press Enter to open the Control Panel.
- In the Control Panel, make sure the “View by” option is set to “Large icons.”
- Locate and click on “File Explorer Options.”
- If “Home” or “This PC” is selected under “Open File Explorer to,” click on “Restore to Defaults.”
- Click “Apply,” then click “OK.”

Step 2: Conduct a scan with System File Chequer (SFC).
- Click on the search icon in the taskbar.
- Type “CMD.”
- Right-click on “Command Prompt” and select “Run as administrator.”
- Click “Yes” if prompted for permission.
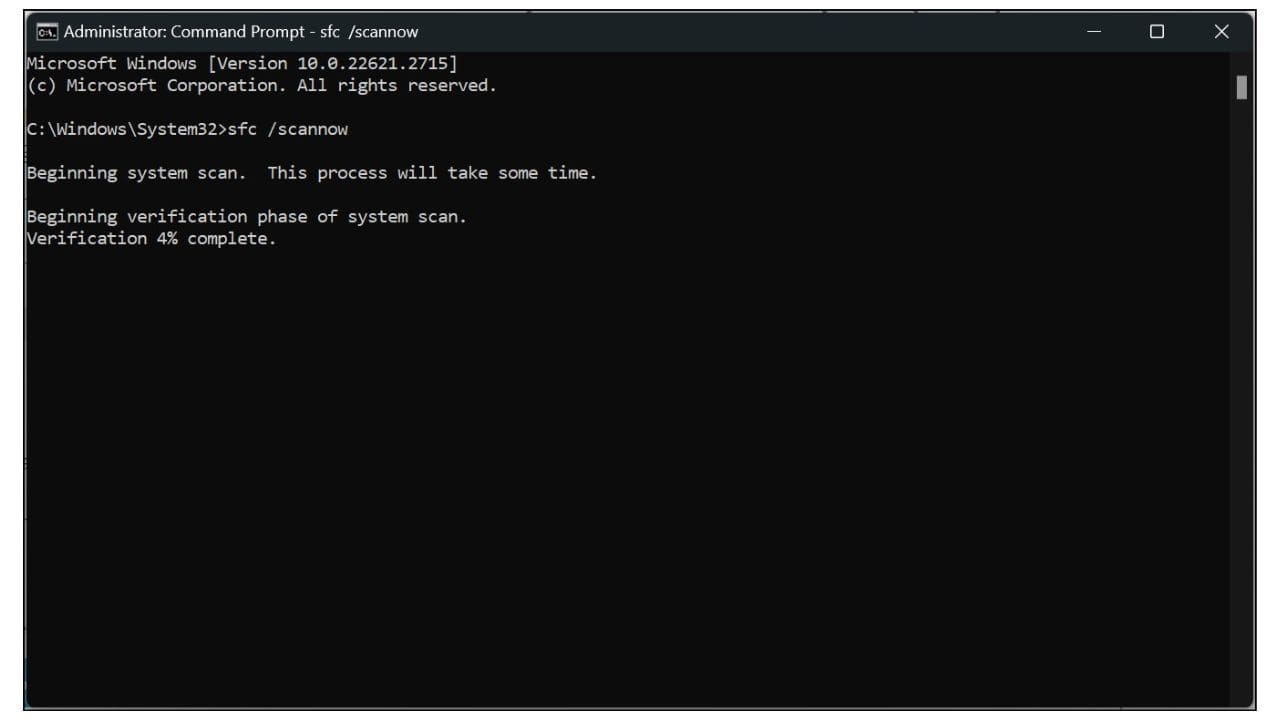
- In the Command Prompt window, type the following command and press Enter:
sfc /scannow- The System File Checker will scan your system for file integrity issues. Seven minutes is a possible wait time for this.

Step 3: Run DISM Cleanup Scan
- Copy the following command from the description (or this article) and paste it into the Command Prompt window:
DISM /Online /Cleanup-Image /ScanHealth- Press Enter to run the DISM cleanup scan. This scan could take a few minutes to finish.

Step 4: Run DISM Restore Health
- In the same Command Prompt window, copy and paste the following command:
DISM /Online /Cleanup-Image /RestoreHealth- Press Enter to initiate the DISM restore health process.
Step 5: Restart Your Computer
After completing the above steps, restart your computer. These scans should help resolve any underlying issues with your Windows operating system that may have been causing File Explorer crashes.
Bonus Tip: Restart File Explorer
If you’re still experiencing File Explorer issues, you can try this additional step:
- Open File Explorer.
- Right-click on the Start icon in the taskbar.
- Select “Task Manager.”
- In the Task Manager window, locate “Windows Explorer” under the “Processes” tab.
- Right-click on “Windows Explorer” and choose “Restart.”

This action can often quickly resolve File Explorer problems.
We hope this guide has helped you fix the File Explorer crashing issue on your Windows 10 or Windows 11 computer. If you found this article helpful, please let us know in the comments. If you have any questions or need further assistance, feel free to ask. Thank you for watching!