Windows Defender, Microsoft’s built-in antivirus and antimalware solution, plays a crucial role in safeguarding your Windows 10 and Windows 11 systems against various online threats. However, there may be instances where Windows Defender encounters issues and stops working as expected, leaving your system vulnerable to malware and other security risks.

In this guide, we will explore common reasons behind Windows Defender not working in Windows 10 and Windows 11, and provide you with practical solutions to resolve these issues. Whether it’s a disabled real-time protection feature, update problems, or conflicts with third-party security software, we’ll walk you through the steps to get Windows Defender up and running smoothly again, ensuring your computer remains protected.
Step 1: Check for Windows Security
- If you can’t find Windows Security or it’s not opening as expected, try the following:
- Right-click on the Start icon.
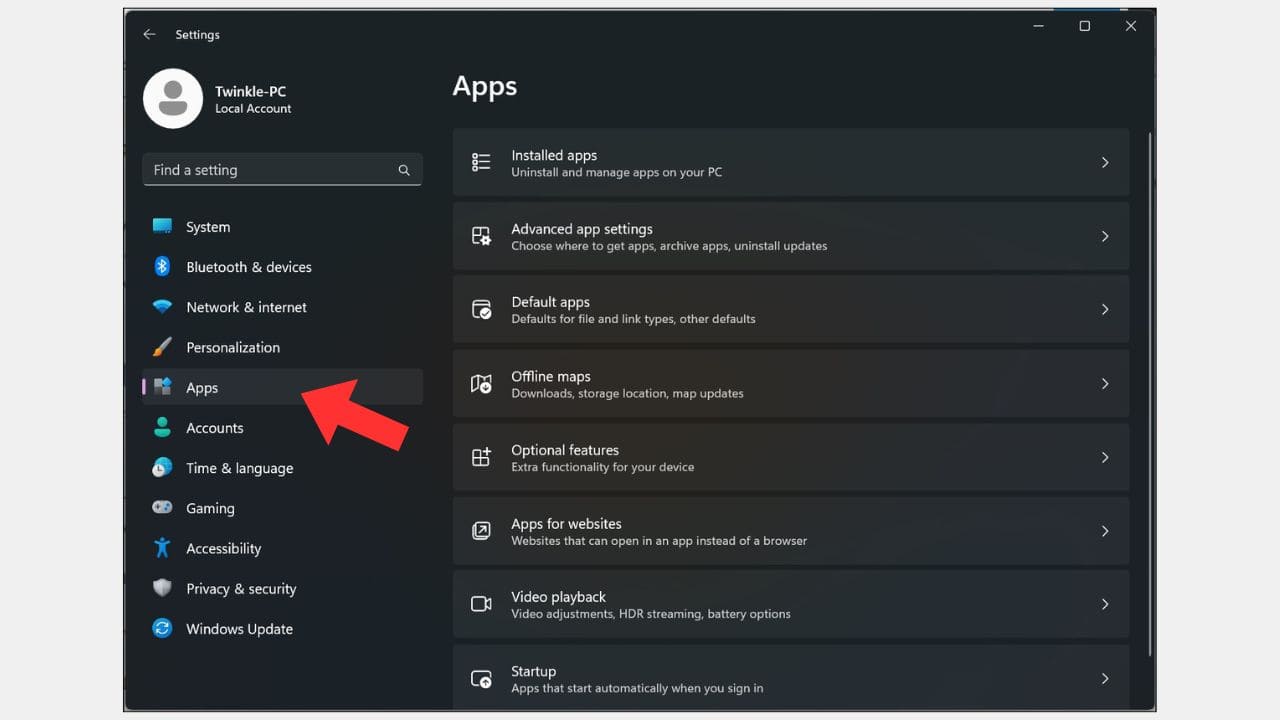
- Click on “Settings.”
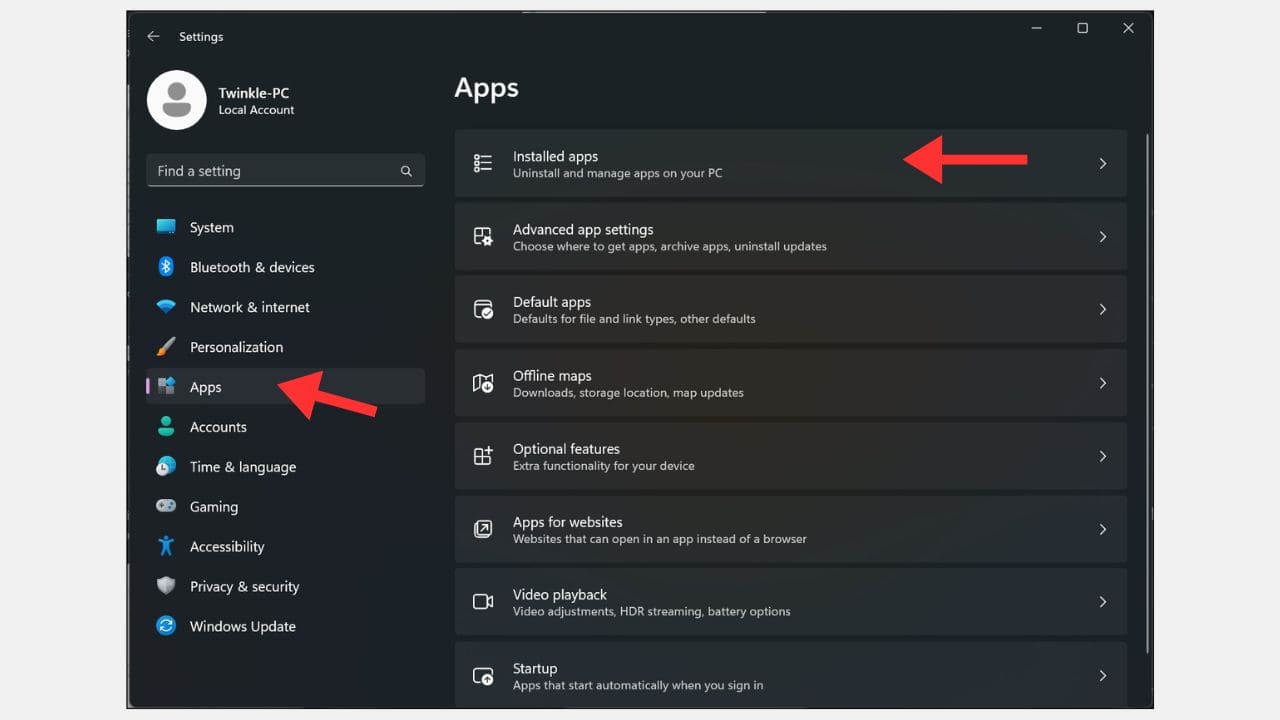
- In the Settings menu, locate and click on “Apps” (this method works for both Windows 10 and Windows 11).

Step 2: Access Windows Security Settings
- Within the “Apps” section, search for “Windows Security.”
- Click on “Windows Security” to select it.
- Next, click on “Advanced options.”

Step 3: Adjust Background Apps Permissions
- In the “Advanced options” section, ensure that “Background apps” permission is enabled.
- You can choose either “Power optimized” or “Always.”
- Once you’ve made your selection, click on “Repair.”

Step 4: Restart Your Computer
- After completing the repair, it’s advisable to restart your computer.
- This often resolves the Windows Defender issue.
Step 5: Further Troubleshooting (if needed)
- If the problem persists, consider the following steps:
- Open the Command Prompt as an administrator.
- To do this, type “cmd” in the search bar, right-click on “Command Prompt,” and select “Run as administrator.”

Step 6: Run System File Checker
- In the Command Prompt, enter the following command:’sfc /scannow’.
- The System File Checker provided by Microsoft will scan your system files for issues. This may take a few minutes.
- Once complete, restart your computer.
Step 7: Run DISM (Deployment Imaging Service and Management Tool)
- In the same Command Prompt window, type and press Enter the following command:
DISM /Online /Cleanup-Image /RestoreHealth- This process may take some time, depending on your computer’s speed and processor.
- After completion, restart your computer again.
Conclusion:
After following these steps, check to see if Windows Defender (Windows Security) is now functioning correctly. Hopefully, this troubleshooting guide has helped you resolve the issue.
Please consider liking and subscribing for more helpful article. If you encounter any difficulties or have questions, feel free to ask. Have a great day!