Are you tired of experiencing high ping while playing games on your Windows 11 or Windows 10 computer? If so, this article is here to help you. Lowering your ping in games can significantly improve your gaming experience. Follow this step-by-step guide carefully, and you’ll be able to do it easily.
Step 1: Accessing the Registry Editor
- Right-click on the Start icon and select “Run.”
- Type “regedit” and click “OK.” Grant necessary permissions if prompted.
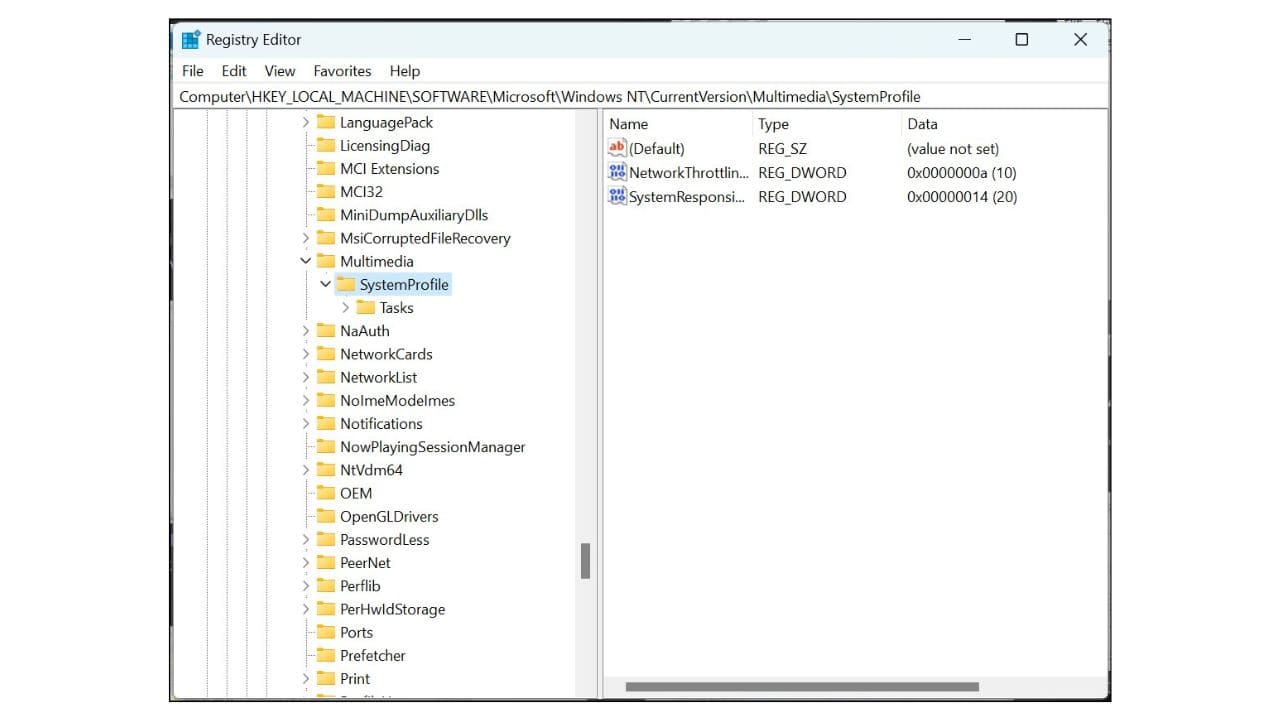
- Navigate to HKEY_LOCAL_MACHINE -> SOFTWARE -> Microsoft -> Windows NT -> CurrentVersion -> Multimedia -> SystemProfile.

Step 2: Modifying Network Throttling
- Locate NetworkThrottlingIndex on the right-hand side.
- Right-click and select “Modify.”
- Replace the existing value with eight consecutive “F” characters (FFFFFFFF).
- Click “OK” to confirm the change.

Step 3: Configuring Network Adapter Settings
- Right-click on the Start icon and select “Run” again.
- Type “ncpa.cpl” and click “OK.”
- Right-click on your Ethernet or Wi-Fi connection and select “Properties.”
- Navigate to Internet Protocol Version 4 (TCP/IPv4) under the Networking tab.
- Choose “Use the following DNS server addresses” and enter either 8.8.8.8 (primary) and 8.8.4.4 (secondary) or 1.1.1.1 (primary).
- Click “OK” and then “Close.”

Step 4: Optimizing Network Adapter Settings
- Right-click on the Start icon and select “Device Manager.”
- Locate your network adapter under “Network Adapters” (e.g., Realtek PCIe GbE Family Controller for Ethernet or your wireless adapter for Wi-Fi).
- Right-click on your adapter and select “Properties.”
- Go to the “Advanced” tab and configure the following settings:
- 802.11n/ac/ax Wireless Mode: Select “Dual band.”
- Channel Width for 2.4GHz: Set to “Auto.”
- Channel Width for 5GHz: Set to “Auto.”
- Fat Channel Intolerant: If disabled, enable it.
- Roaming Aggressiveness: Set to “Lowest” if your router is nearby and the signal is strong.
- Preferred Band: Choose “5GHz” if available.
- Click “OK” to save your changes.

Step 5: Restart Your Computer
Restart your computer to apply the changes effectively.
After following these steps, check your game’s ping and see the improvement. Please share your thoughts by posting a comment below.