we are going to discuss how to repair your Windows 10 or Windows 11 computer. The steps we will be taking are absolutely the same for both Windows 10 and Windows 11. I’ll be sharing three powerful and easy steps that you need to follow to repair your computer. If you still encounter issues after following these steps, I’ll also show you how to reset your PC without deleting your data or files. So, let’s get started.
Step 1: System File Check (SFC)

The very first command we need to use is sfc /scannow. Once you type this command, it will begin the system scan. This process might take five to seven minutes or even more, depending on your computer’s performance. You can leave the system as it is during this time. After the scan is complete, restart your computer and check if the issues have been resolved. If not, proceed to the next step.
Step 2: Deployment Image Servicing and Management (DISM) is the second step.
Search for “CMD” and run it as an administrator. Previously, we used the System File Checker (SFC). Now, we will use Deployment Image Servicing and Management (DISM) to replace and restore all of your Windows files. Copy and paste the following command:
dism /online /cleanup-image /restorehealthAfter typing this command, hit enter, and the Deployment Image Servicing process will start. This is a Microsoft tool that works perfectly on Windows 7, 8, 10, or 11 computers. Once it’s done, restart your computer and check for improvements.
Step 3: Windows Troubleshooter

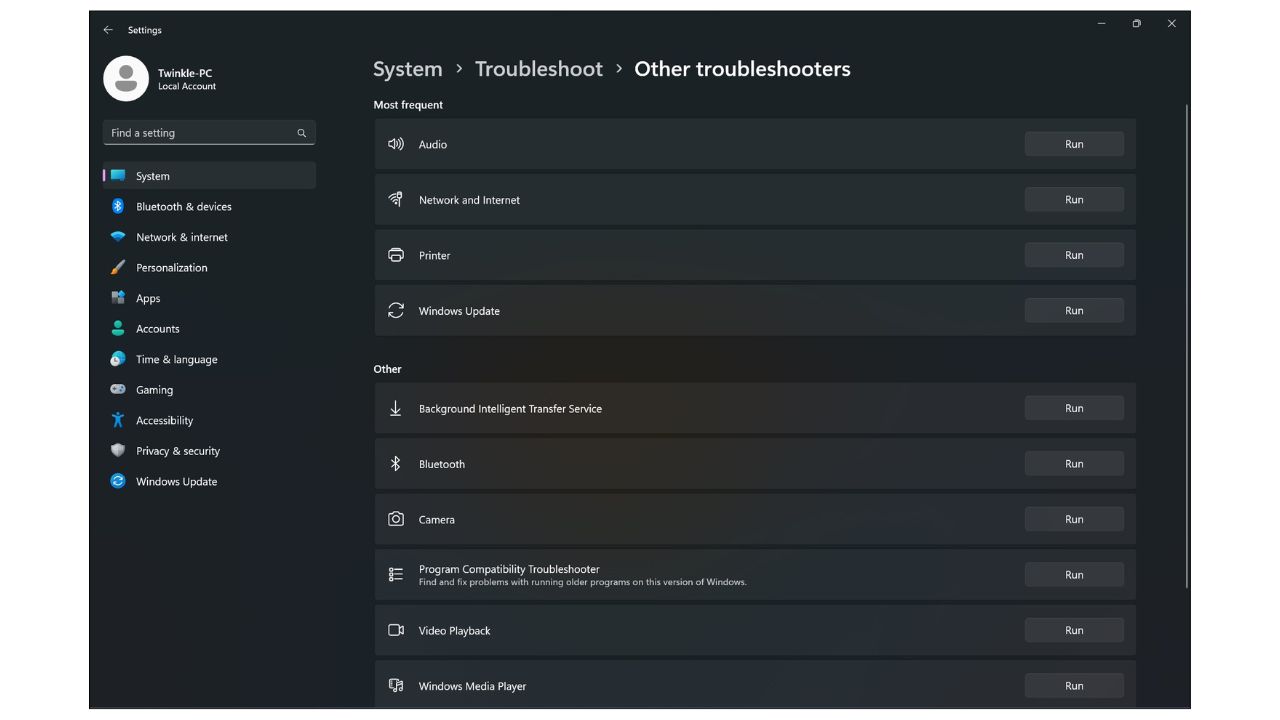
The third step is more specific to the problem you are facing. To access the Windows Troubleshooter, click on the search bar and type “troublesh.” Click on “Troubleshoot settings.” A window will appear with various troubleshooting options. Click on the relevant troubleshooter for your issue, whether it’s related to audio, printer, Windows update, camera, network, and so on. Click “Run” to start the troubleshooting process. This is a powerful and effective tool to identify and fix specific issues.
If you still have problems with your computer and want to repair it without deleting your data, follow these steps:

- Go to the search window and type “recovery.”
- Click on “Recovery options.”
- Select “Reset this PC.”
- Choose an option:
- Select “Keep my files” to uninstall programmes and settings while retaining your personal files.
- “Remove everything” to delete all personal files, apps, and settings.
I recommend selecting “Cloud download” for the reinstallation of Windows. This process may require an additional 4 to 5 GB of data. Follow the online instructions, and your computer will be restarted several times during this process.
If you encounter any concerns or issues, please let me know in the comments section. I’ll be happy to assist you. Keep an eye out for more useful article in the future!
- 10 Amazon Prime Benefits You May Not Know About
- How To Reduce High Ping on Windows 11/10
- 7 Features That Might Make You Want to Triple Your Microsoft 365 Licensing Cost with Microsoft 365 E5
- Fixing Common Windows Update Errors on Windows 10 and Windows 11
- How to Move Files from Dropbox to OneDrive-Using MultCloud!