If you’re experiencing high RAM usage on your Windows 11 computer, don’t worry; we’ve got you covered. In this guide, we’ll walk you through some straightforward steps to resolve this issue and rejuvenate your computer’s performance. By the end of this article, your PC should feel as snappy as a brand new machine.

Step 1: Disable Unnecessary Services
- Right-click on the Start icon and select “Run.”
- In the Run dialog box, type “Services.msc” and hit OK. This will open the Services window.
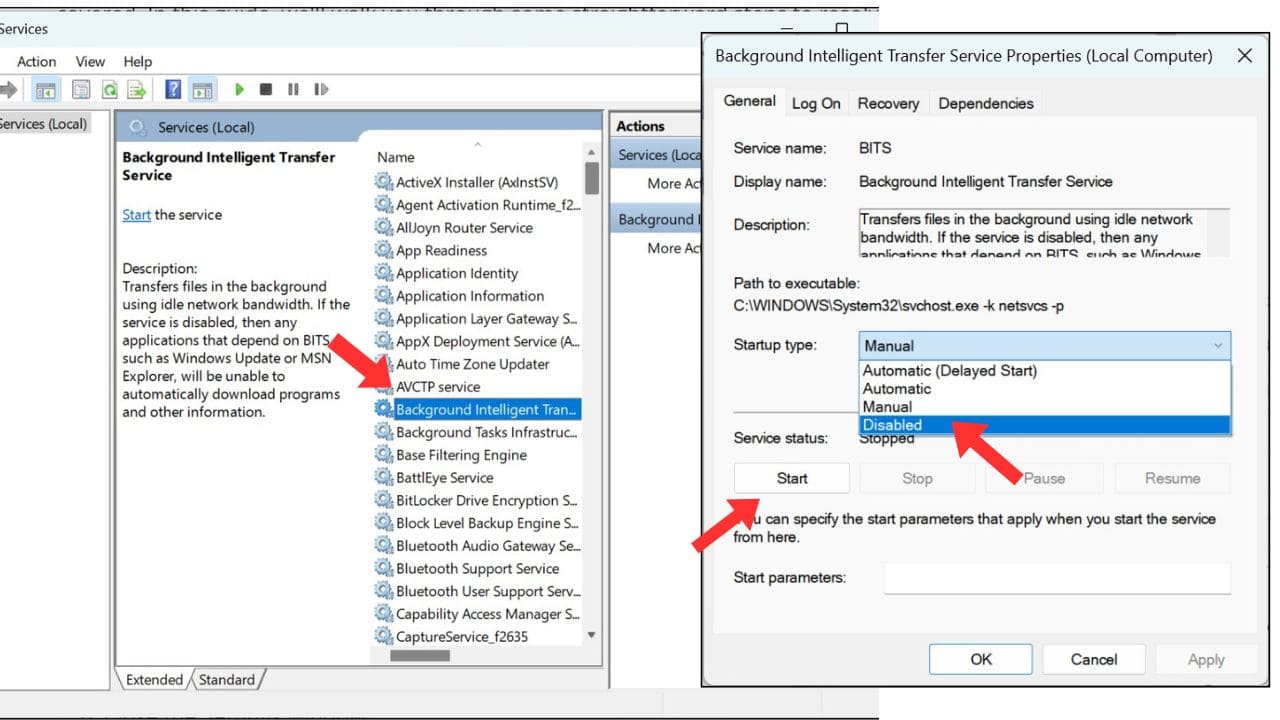
- Locate the “Background Intelligent Transfer Service,” right-click on it, choose “Properties,” and set the Startup type to “Manual.” If it’s already stopped, click “Start” and then click “Apply” and “OK.”
- Look for “Superfetch” (or “SysMain” on newer computers), right-click on it, choose “Stop,” and then set the Startup type to “Disabled.” Click “Apply” and “OK.”
- Close the Services window.

Step 2: Adjust Privacy Settings
- Right-click on the Start icon and select “Settings.”
- In the Settings menu, go to “Privacy & Security.”
- Under “General,” turn off options like “Show me personalized ads using my advertising IDs.”
- Navigate to “Diagnostic & Feedback” and turn off “Optional diagnostic data.”
- Optionally, you can disable “Activity History” as well.
- Close the Settings window.

Step 3: Optimize Google Chrome
- Open Google Chrome.
- Click the three dots in the top-right corner to access the menu.
- Go to “Settings.”
- Under “Performance,” enable “Memory saver” to free up RAM from inactive tabs.
- In “System,” enable “Use hardware acceleration” and disable “Continue running background apps when Google Chrome is closed.”
- Close the Google Chrome settings.

Step 4: Manage Startup Apps
- Right-click on the Start icon and select “Task Manager.”
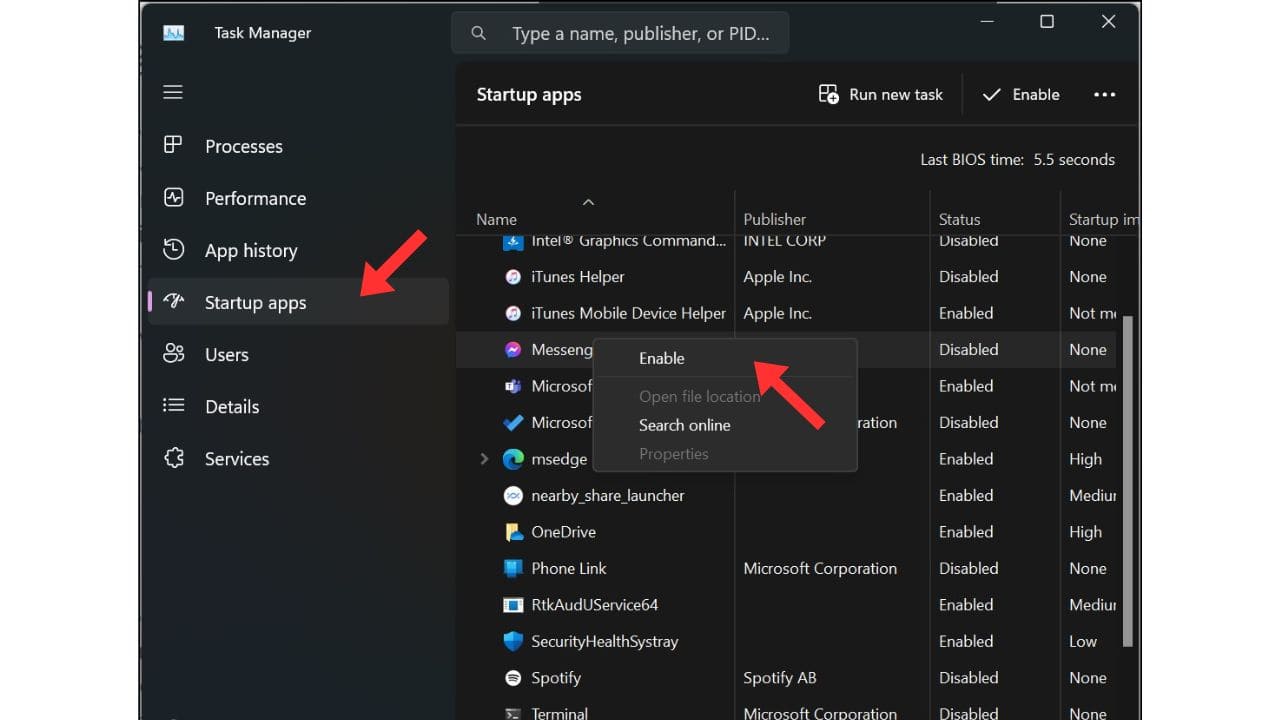
- Navigate to the “Startup” tab.
- Disable unnecessary startup items by right-clicking on them and selecting “Disable.” Leave essential services like graphics and security enabled.
- Close the Task Manager.

Step 5: Run a Virus Scan
- Use your third-party security software or Windows Defender (Windows Security) to run a quick scan for viruses and threats. Remove any detected malware.
Step 6: Use Disk Cleanup Utility
- Right-click on the Start icon and select “Run.”
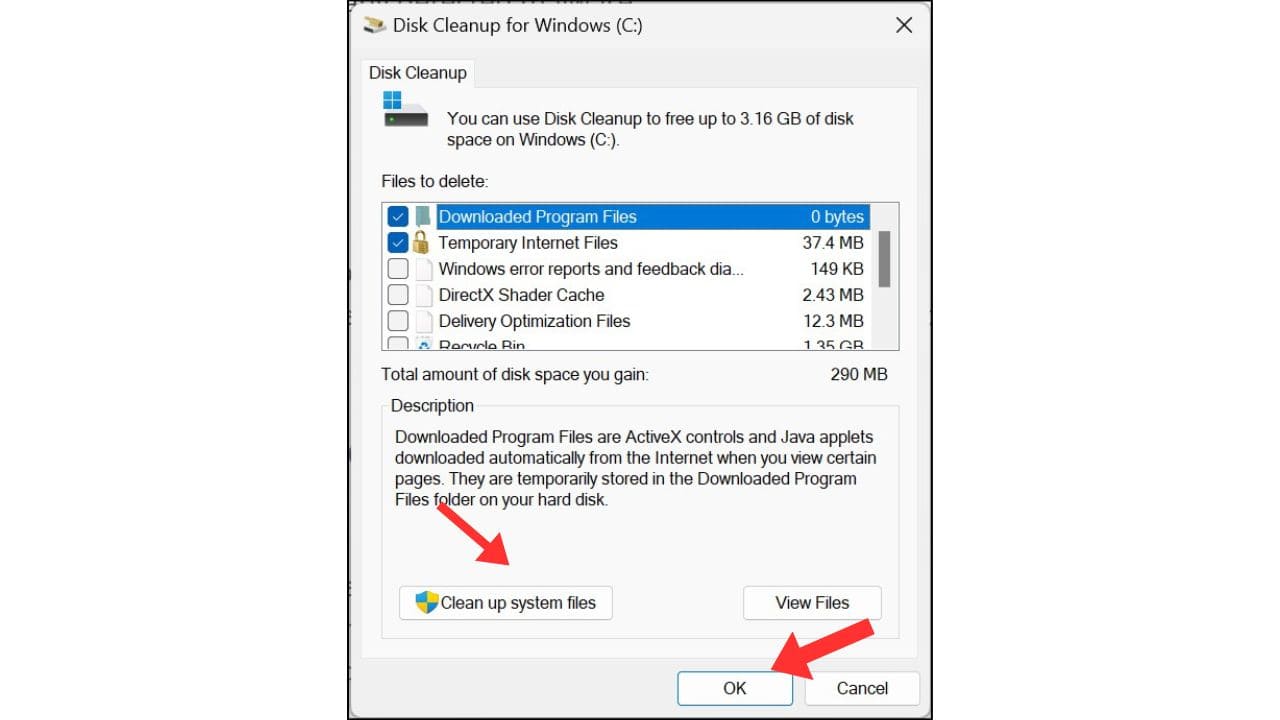
- Type “Cleanmgr” and press OK.
- Choose the drive you want to clean up (usually the C: drive) and click OK.
- Select the file types you want to delete and click OK. This will help free up disk space and improve overall performance.

Step 7: Uninstall Unwanted Applications
- Right-click on the Start icon and select “Run.”
- Type “Appwiz.cpl” and press OK to open the Programs and Features window.
- Uninstall any unwanted applications that you no longer use to free up system resources.
- Close the Programs and Features window.

Step 8: Repair Windows System Files
- Type “cmd” in the search bar, right-click on “Command Prompt,” and select “Run as administrator.”
- In the Command Prompt window, type “sfc /scannow” and press Enter. This will scan and repair any corrupted Windows system files.
- After the scan is complete, restart your computer.

Step 9: Update Windows
- Right-click on the Start icon and select “Settings.”
- Go to “Windows Update.”
- Click “Check for updates” to ensure your system is up to date. Install any pending updates.

By following these steps, you should see a significant improvement in your computer’s performance, with reduced RAM usage. Please share your results and experiences in the comments section to help others with similar issues. Your feedback is valuable. Thank you for taking the time to read this, and have a wonderful day!