Hello everyone, I hope you’re doing well. In this article, we’re going to show you how to resolve the issue of USB devices not being recognized on your Windows 11 or Windows 10 computer. We’ll be walking you through some straightforward steps, so make sure to follow them closely. One of these steps is likely to solve your problem.

Step 1: Access Control Panel
- Click on the search icon and type “control.”
- Select “Control Panel” from the search results.
- In Control Panel, switch from the default category view to “Large Icons” for easier navigation.

Step 2: Adjust Power Settings
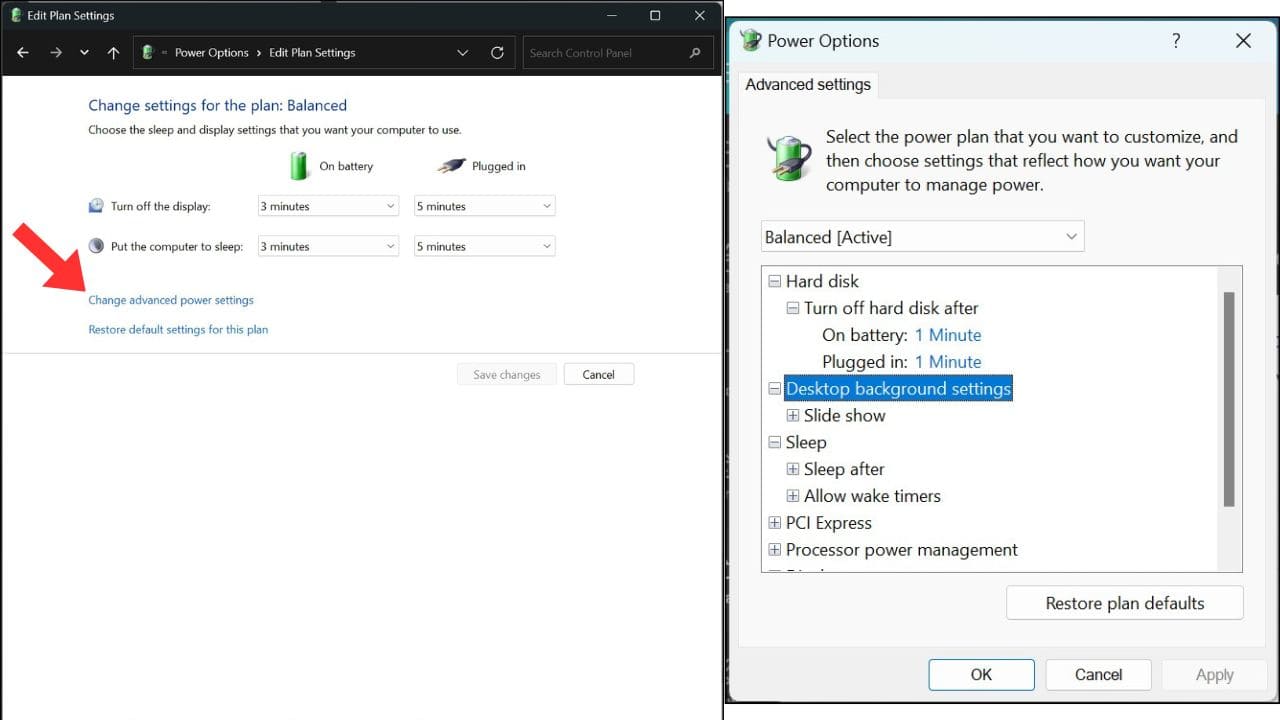
- Click on “Power Options.”
- On the left-hand side, select “Change when the computer sleeps.”
- Then, click on “Change advanced power settings.”
- Locate “USB settings” (note: it might not be visible in some cases).
- If it’s present, click on it and choose to disable it.
- Click “Apply” and then “OK” to save your changes.

Step 3: Device Manager
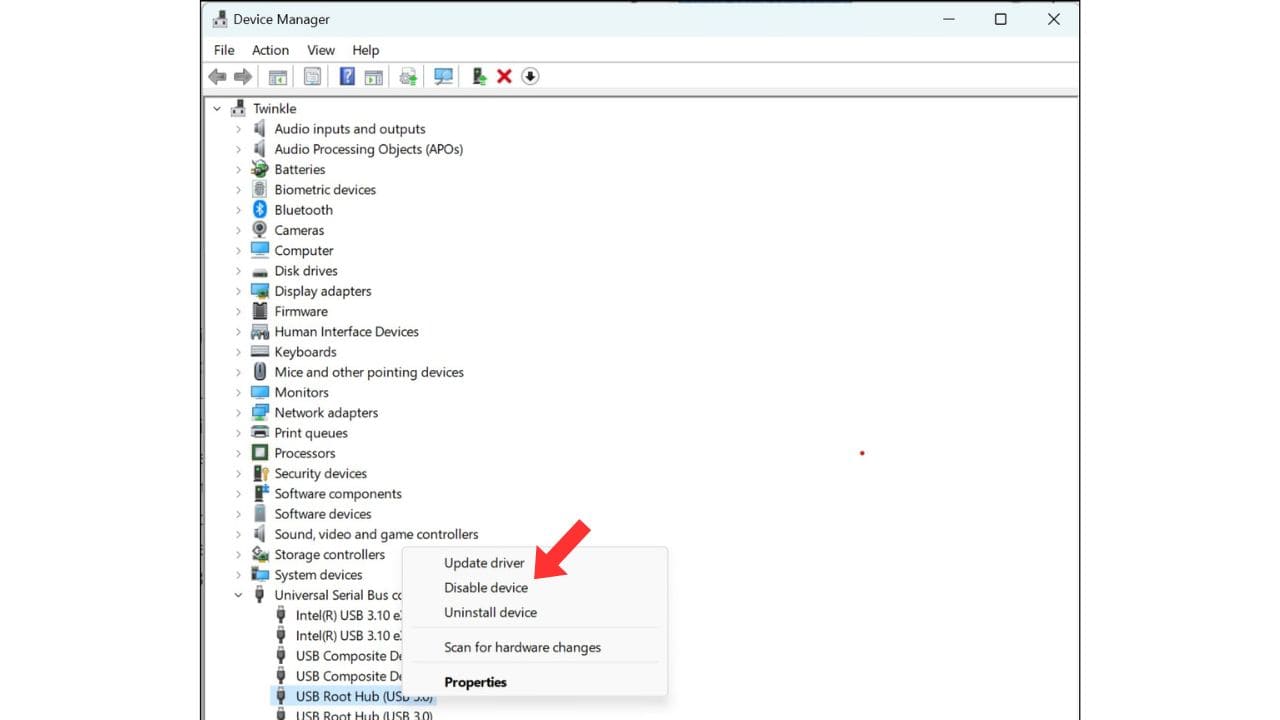
- Right-click the Start icon and select “Device Manager.”
- In Device Manager, find “Universal Serial Bus controllers.”
- Double-click to expand it.
- Right-click on “USB Host Controller” and select “Update driver,” then choose “Search automatically for drivers.”
- Repeat the same process for any other controller listed.
- If possible, update “USB Composite Device” and “USB Root Hub” as well.
- If you see an option to disable any of these devices, do so, then enable them again. This refreshes the USB service.

Step 4: Install WPDMT
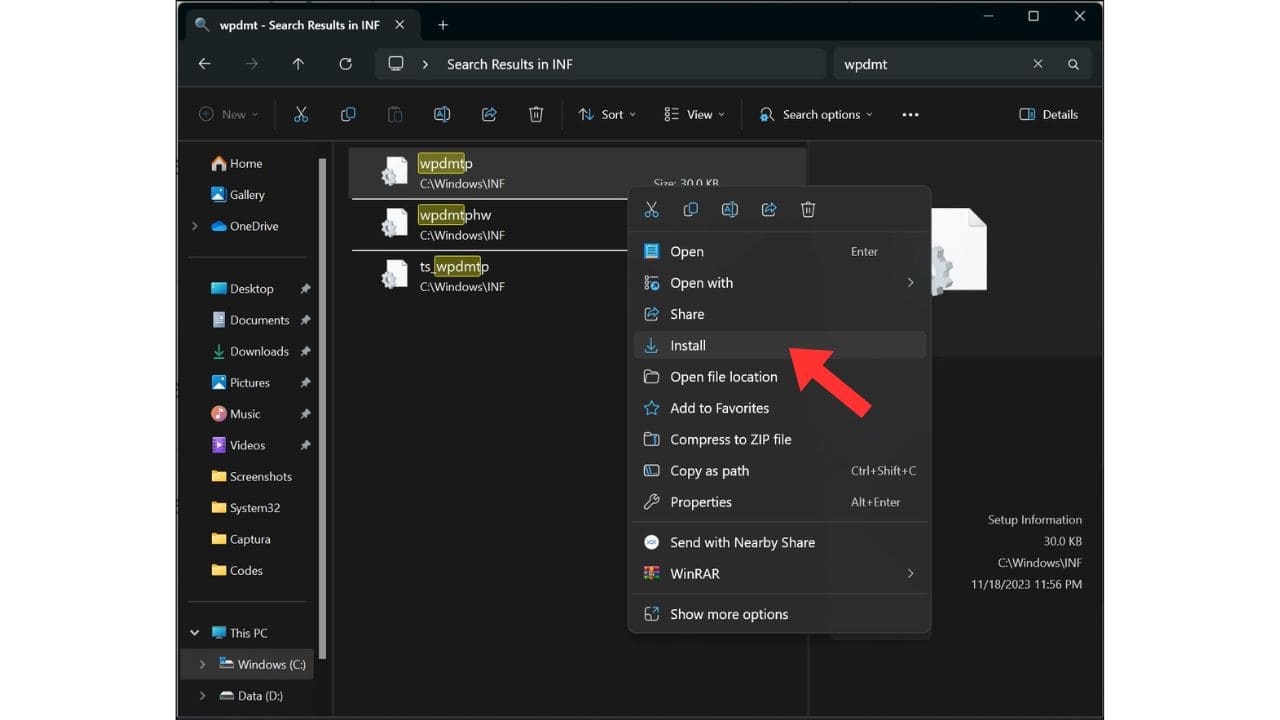
- Click on the search icon and type “File Explorer.”
- Navigate to “This PC,” then go to the “C” drive.
- Access the “Windows” folder and search for the “INF” folder.
- Inside the “INF” folder, type “WPDMT” in the search bar.
- Locate the INF file named “WPDMT,” right-click it, and select “Install.”

Step 5: Restart Your Computer
- After installing WPDMT, restart your computer. For most users, this should resolve the issue.
Step 6: Disk Management
- Click on the search icon and type “Disk Space Management.”
- Select “Create and format hard disk partitions.”
- In Disk Management, look for the USB device that’s connected.
- Right-click on it and choose “Change drive letter.”
- Modify the drive letter (e.g., from E to another letter of your choice).
- Click “Apply” and then “OK.”

Final Step: Restart Your Computer
- Restart your computer once more to ensure all changes take effect.
Conclusion:
These troubleshooting steps should resolve USB recognition issues in Windows 11 and Windows 10. If you’ve followed these steps and your USB device is still not recognized, consider checking for Windows updates via the Settings menu, as updating your operating system can often resolve various issues.