Hello everyone! I hope you’re doing well. In this article, we are going to show you how to make your Windows 11 computer much faster than before. Trust me, by following these simple yet powerful steps, your computer’s performance will undergo a significant improvement.
1. Optimize Storage:
Begin by right-clicking on the Start button and selecting “Settings.” On the left-hand side, click on “System.” Under “System,” you’ll find “Storage.” Click on it. Inside the “Storage” settings, enable “Storage Sense.” This feature will automatically free up space by deleting temporary files, registries, and other unnecessary items. By default, Storage Sense is turned off, so remember to turn it on manually.

2. Enhance Privacy and Security:
In the same window, look for “Privacy and Security.” Click on it and scroll down to find “Diagnostic and Feedback.” Ensure that you turn off the option to “Send Optional Diagnostic Data” if you don’t want to share data with Microsoft for improving Windows Experience.

3. Optimize for Gaming:
Still in the same window, click on “Gaming” on the left sidebar and make sure “Game Mode” is turned on. This setting will optimize your PC for better gaming performance.

4. Adjust Power Settings:
Navigate to “System” again and then scroll down to find “Power and Battery.” Select “Best Performance” for improved power efficiency.

5. Disable Unnecessary Windows Services:
To disable unnecessary Windows services, right-click on the Start icon and select “Run.” In the Run window, type “Services.msc” and click “OK.” A new window will appear. Right-click on any service that you don’t need (e.g., those related to Smart TVs or remote connections) and set it to “Disabled.”
6. Optimize Visual Effects:
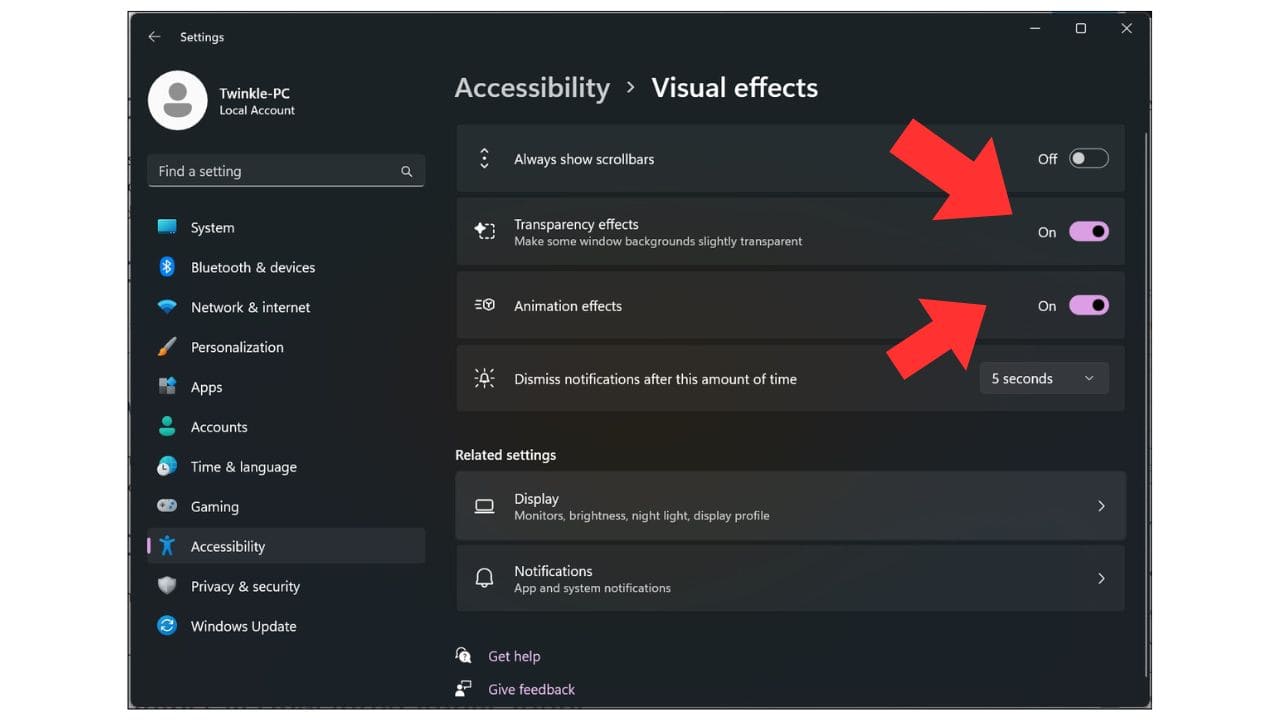
Right-click on the Start icon, go to “Settings,” then “Accessibility,” and finally, “Visual Effects.” Disable transparency and animation effects for better CPU performance.

7. Manage Startup Applications:
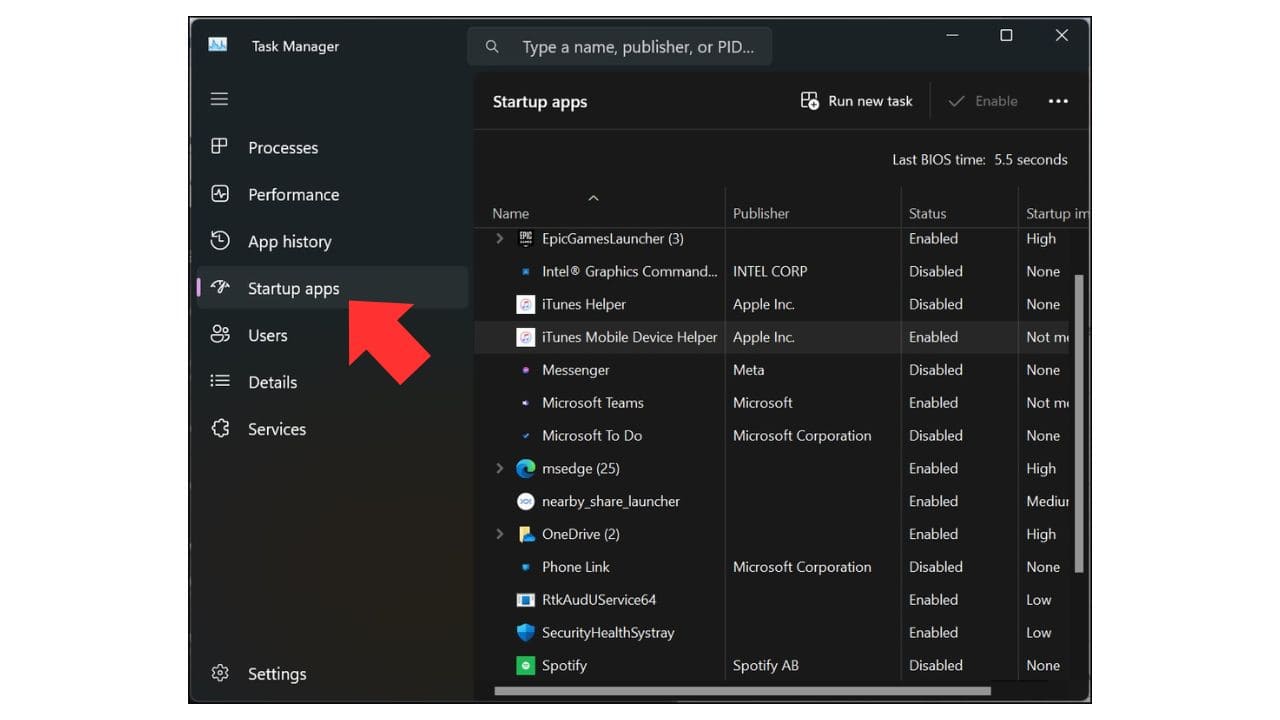
Open Task Manager by right-clicking on the Start icon and selecting it. Disable unnecessary startup applications to prevent them from slowing down your computer.

8. Disk Cleanup:
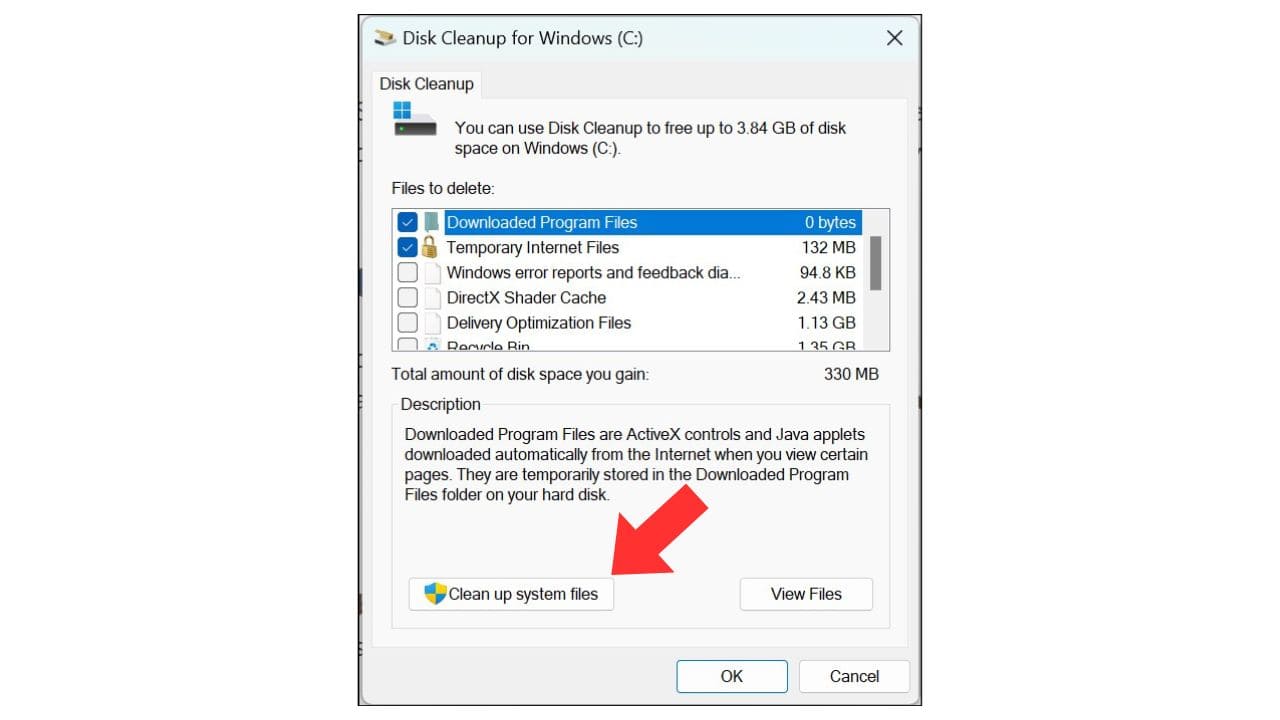
Open the Run window again by right-clicking on the Start icon and selecting “Run.” This time, type “Cleanmgr” and click “OK.” In the Disk Cleanup window, select all the options to delete temporary files and unnecessary data.

9. Uninstall Unwanted Applications:
Press Windows + R or right-click on the Start icon and select “Run.” Type “appwiz.cpl” and click “OK” to open the Programs and Features window. Uninstall any unwanted applications to free up space and improve performance.

10. Keep Windows Updated:
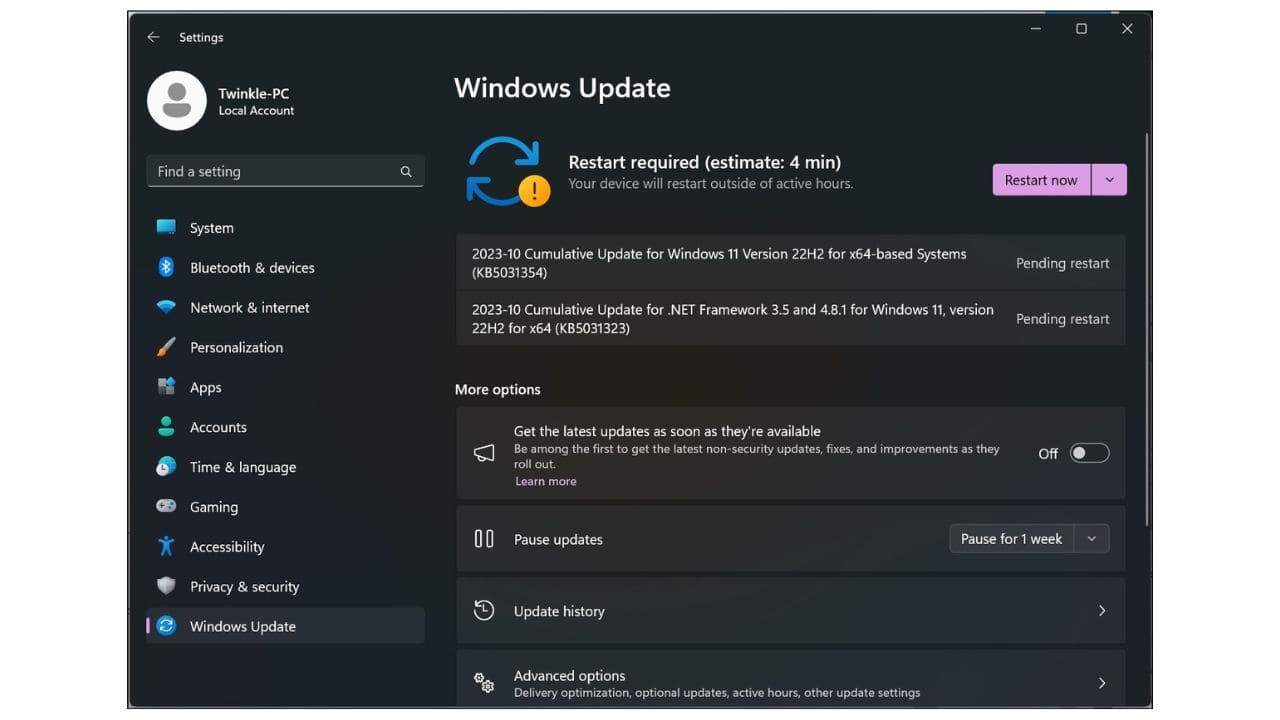
Search for “Windows Update Settings” in the search bar and make sure to keep your Windows 11 up-to-date. Updates improve system performance and security.

After following these steps, restart your computer and notice the improvement in performance. Don’t forget to like and subscribe for more useful information! Have a wonderful computing experience!
- 10 Amazon Prime Benefits You May Not Know About
- How To Reduce High Ping on Windows 11/10
- 7 Features That Might Make You Want to Triple Your Microsoft 365 Licensing Cost with Microsoft 365 E5
- Fixing Common Windows Update Errors on Windows 10 and Windows 11
- How to Move Files from Dropbox to OneDrive-Using MultCloud!