In this article we will guide you through the process of installing Windows 11 using a USB drive. This method is perfect for fresh new builds or clean reinstalls. Please note that you will need a USB drive with a capacity of at least 8 gigabytes, and make sure it doesn’t have any data you want to keep since everything on it will be deleted. You’ll also need a computer connected to the internet for this process. We recommend having only the drive you intend to install Windows on connected to the computer to avoid confusion.

Preparing Your Computer (if currently running Windows 10):
Before we begin with the installation, let’s quickly address the steps for those who are currently running Windows 10 on their computers.
- Run a PC Health Check to determine if your PC is compatible with Windows 11. You can usually find this tool on your Windows 10 computer by searching for “PC health check” in the Windows search. If it’s not installed, you can download it from the Windows 11 website.
- To download PC Health Check from the Windows 11 website, scroll to the bottom of the download page and click on the provided link. Save the file somewhere you’ll remember.
- Once the file is downloaded, navigate to its location and double-click to launch the PC Health Check app.
- Run the PC Health Check by clicking on the “Check now” button. It will inform you if your computer is compatible with Windows 11.
Downloading Windows 11 Installation Media:
- Visit the Windows 11 download page.
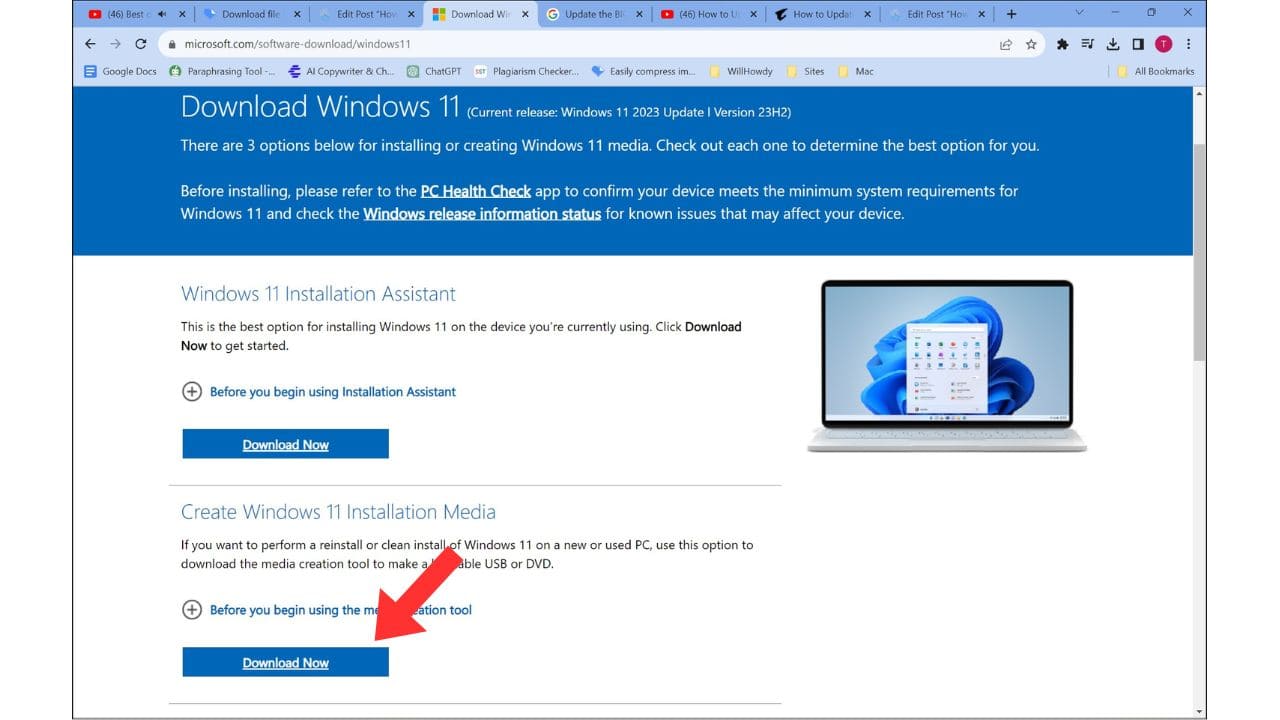
- Look for the section labeled “Create Windows 11 Installation Media” and read the “Before you begin” section for important information about the installation.
- Click the “Download now” button to download the Media Creation Tool to your computer.
- If you haven’t already, insert the USB drive into your computer and note its drive letter.
- Navigate to the location where you downloaded the Media Creation Tool, double-click it, and grant permission to run it.
- Accept the license agreement, and you’ll be presented with language and edition options. Choose your preferred settings and click “Next.”
- Select “USB flash drive” as the installation media and click “Next.” Choose the correct USB drive from the list.
- After a few seconds, the tool will start creating your installation media. Be patient; depending on your internet connection, this process may take some time.
- Once the process is completed, you can leave the USB drive connected if you’re installing on the same computer. Otherwise, safely eject it for use on the target computer.

Booting from the USB Drive:
- To boot from the USB drive, you’ll need to access your computer’s BIOS settings. The key to access BIOS settings varies by brand but is typically F1 or Delete. Repeatedly press the key during boot until you see the BIOS screen.
- In the BIOS, locate the boot menu (usually in advanced options). Change the first boot option to the USB drive and set the second option to the Windows Boot Manager or the previous first boot drive.
- Save the changes and exit the BIOS. Your computer will now boot directly from the USB drive.
Installing Windows 11:
- Follow the on-screen instructions to customize language, keyboard settings, and other preferences.
- Choose to enter a product key if you have one, or select “I don’t have a product key” if you plan to activate later. Select your preferred Windows 11 version.
- Accept the license agreement and choose the “Custom install” option.
- Select the drive where you want to install Windows 11 and delete any existing partitions until you have only one unallocated space.
- Choose the unallocated space and click “Next” to start the installation process. During this process, your computer may reboot.
- Follow the setup prompts, including connecting to the internet, naming your device, setting up a PIN, and configuring privacy settings.
- Once the setup is complete, you’ll be on the Windows 11 desktop, and the installation is successful.
- You can now proceed to install drivers and any additional software you need.
Conclusion:
Congratulations, you’ve successfully installed Windows 11! If you found this article helpful. Let us in the comment box.
- How To Upgrade Windows 11
- A Step-by-Step Guide to Installing a Liquid Freezer 2 on an LGA 1700 Motherboard
- Building a 12th Gen Intel i5 PC for Gaming and Video Editing
- How to Install Your Corsair All-in-One Cooler on an LGA 1700 Motherboard
- How to Permanently Install LUTs in Adobe Premiere Pro and After Effects